5.2. How to modify existing PyMoDAQ’s code?
Author email |
|
Last update |
january 2024 |
Difficulty |
Intermediate |
In this tutorial, we will learn how to propose a modification of the code of PyMoDAQ. By doing so, you will learn how to contribute to any open-source project!
5.2.1. Prerequisite
We will suppose that you have followed the tutorial
In the latter, we presented how to deal with the interaction of a local repository with a remote repository. Up to now we just worked on our own. In the following we will learn how to contribute to an external project like PyMoDAQ!
5.2.2. The PyMoDAQ repositories
Let’s now go to the PyMoDAQ GitHub account.

There are a lot of repositories, most of them correspond to Python packages. Briefly, there is:
The PyMoDAQ repository: this is the core of the code, you cannot run PyMoDAQ without it.
The plugins’ repositories: those repositories follow the naming convention pymodaq_plugins_<name>. Most of the time, <name> corresponds to the name of an instrument supplier, like Thorlabs. Those are optional pieces of code. They will be useful depending on the instruments the final user wants to control.
5.2.3. PyMoDAQ branches
Let’s go to the PyMoDAQ repository.
Note
Be careful not to confuse the PyMoDAQ GitHub account and the repository.
There are several branches of the PyMoDAQ repository. Branches are used to prepare future releases, to develop new features or to patch bugs, without risking modifying the stable version of the code. The full branch structure is described at length in the Developer’s guide. For our purposes here, let us just mention the two most important branches:
the stable branch. It is the present state of the code. When you install PyMoDAQ with pip, it is this version of the code that is downloaded.
The development branch. It is ahead of the main branch, in the sense that it contains more recent commits than the main branch. It is thus the future state of the code. This is where the last developments of the code of PyMoDAQ are pushed. When the developers are happy with the state of this branch, typically when they finished to develop a new functionality and they tested it, they will merge the develop branch into the main branch, which will lead to a new release of PyMoDAQ.
5.2.4. How to propose a modification of the code of PyMoDAQ?
Compared to the situation in the Basics of Git and GitHub tutorial, where we had to deal with our local repository and our remote repository, we now have to deal with an external repository on which we have no right. This external repository, which in our example is the PyMoDAQ one, is called the upstream repository. The workflow is represented the schematic below and we will detail each step in the following.

5.2.4.1. (1) Fork the upstream repository
Note
In the screenshots below, the stable and development branches are called main and pymodaq-dev. This naming scheme is now deprecated. Branch names now correspond to the current PyMoDAQ versions. For instance, if the current stable version is 5.6.2, the stable branch will be called 5.6.x and the development branch will be called 5.7.x_dev.
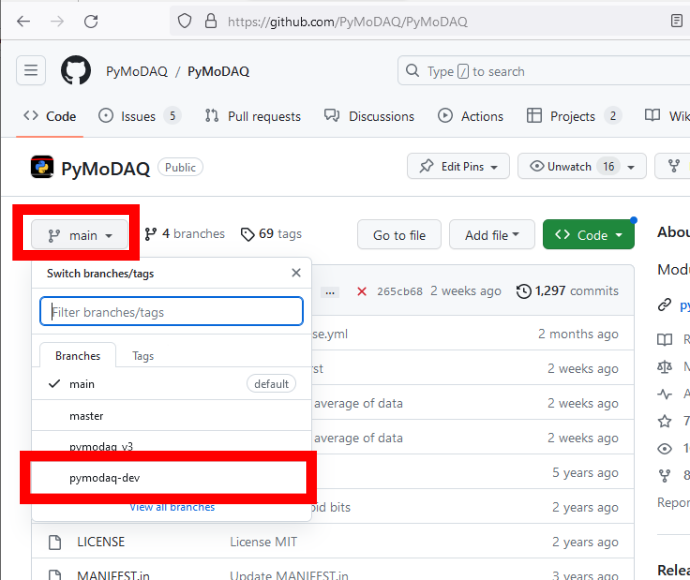
While we are connected to our GitHub account, let’s go to the PyMoDAQ repository and select the pymodaq-dev branch. Then we click on the Fork button.

This will create a copy of the PyMoDAQ repository on our personal account, it then become our remote repository and we have every right on it.

Every modification of the code of PyMoDAQ should first go to the pymodaq-dev branch, and not on the main branch. The proper way to propose our contribution is that we create a branch from the pymodaq-dev branch, so that it will ease the integration of our commits and isolate our work from other contributions.
We create a branch monkey-branch from the pymodaq-dev branch.

5.2.4.2. (2) Clone our new remote repository locally
We will now clone our remote repository locally.
Open PyCharm. Go to Git > Clone… and select the PyMoDAQ repository, which correspond to our recent fork.

Note
Here we put the local repository inside a PyCharmProject folder and called it PyMoDAQ, but you can change those names if you wish.
We configure PyCharm so that we have the good Python interpreter and we choose the monkey_branch of our remote repository.

5.2.4.3. (3) Do modifications and push
We now have the PyMoDAQ code on our local machine. We will put the monkey into the README.rst file at the root of the PyMoDAQ package. This file is the one that is displayed at the home page of a GitHub repository.
We can now go to Git > Commit…, right click on the file and Show Diff.

If we are happy with our modifications, let’s add a commit message and click Commit and Push.

This is the result on our remote repository.

We will now propose this modification, so that the monkey would appear at the front page of the PyMoDAQ repository!
5.2.4.4. (4) Pull request (PR) to the upstream repository
We can be very proud of our modification, but of course, this will not be implemented directly, we will need the agreement of the owner of the PyMoDAQ repository.
Opening a pull request is proposing a modification of the code to the owner of the upstream repository.
This can be done through the GitHub website, at the location of our repository. Either click to Compare & pull request or to the Pull requests tab and New pull request.

Be careful to properly select the branch of our repository and the branch of the upstream repository, and then Send.

That’s it! We now have to wait for the answer of the owner of the upstream repository. Let’s hope he will appreciate our work! We can see the status of our PR on the PyMoDAQ repository home page, by clicking on the Pull requests tab. There a discussion will be opened with the owner of the repository.

Note that opening a PR does not prevent us from working on our remote repository anymore, while waiting for the answer of the owner of the upstream repository. If we continue to commit some changes to the branch that we used for our PR (the monkey_branch here), the PR will be automatically updated, and the new commits will be considered as part of the PR. If we want to pursue the work but not put the following commits in the PR, we can start a new branch from the monkey_branch.